|
| ||||
|
|||||||||
|
|
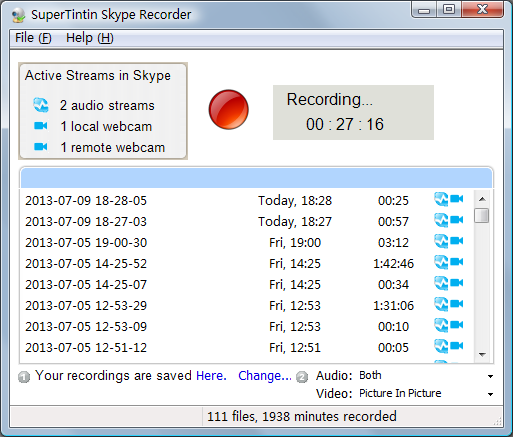
SuperTintin User GuideSuperTintin is a brilliant piece of software that allows you to record all of the conversations that you conduct over Skype and MSN Live Messenger. How do you navigate the SuperTintin Main Window?The SuperTintin main window is incredibly easy to manage. 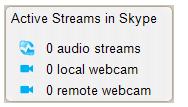
Top Left.At the Top Left of the Main Window is where you"ll find all the information regarding Active Streams in Skype. It will tell you how many audio streams and webcams are available. This is typically one per person, so if you're conducting a simple one-on-one video call with your parents, there will be one audio stream and one web cam for each computer (totally two each). Top Middle.
In the middle you will find a large buttons. You need to click on this button with your mouse cursor, in order to start recording your conversation. This is typically done once you have started your video call or web chat. During recording, this button allows you to stop recording. Top Right.
This box tells you that you are currently recording, and how long the recording is, in hours, minutes and seconds. Main Section.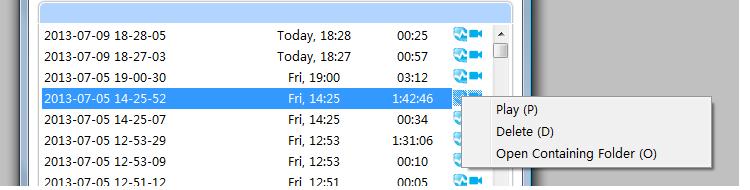
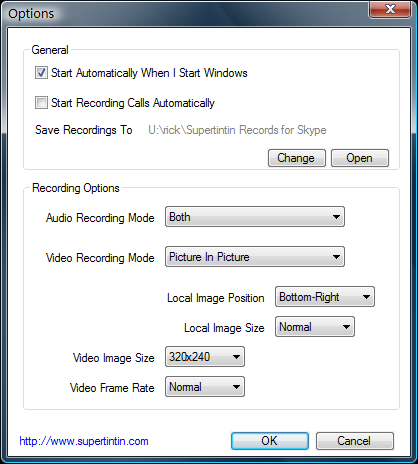
The main section of the window lists all of your SuperTintin recordings, and consists of four columns, the first tells you the exact date and time that the recording was started, the second tells you when it was recorded by day (Today, Wednesday or the date if a long time ago), the third column tells you how long the recording total is, and the final column features one or two symbols (that correspond with the symbols shown in the Active Streams Box), which represent whether the recording includes audio, video or both. You can click right mouse button on the recording to show the pop up menu. Bottom Left.This tells you exactly where your recordings are being saved, and allows you to change the destination of saves, to whichever folder you choose to store them. Bottom Right.Here you have the option of whether you record the audio and/or video for just your side of the call, just their side, or both. For the Picture, it is possible to set it up to record the images side-by-side, allowing you to view both at the same time. How do you configure the Settings?If you need/want to adjust the settings of the SuperTintin software, this can be easily done, by selecting the Help (H) at the very top of the Main Window, and selecting Options from the drop-down menu. From the option window, you can alter several areas of your software's settings, to suit your needs:
How do you configure the General Settings?General. The general section allows you to determine when the software launches, and starts recording: Start SuperTintin Automatically when I Logon Windows:
The General section is the place to see exactly which folder all of your recordings will be saved to. You can also change, or view the saving folder from here. How do you configure the Audio and Video Settings?Recording Options. The Recording Option Sections is where you can determine what exactly you record, how the recordings are set-up and even the quality of them. Audio Recording Mode:Using the drop-down menu, this is where you can select which parts of the audio you want to record, with the options being:
Video Recording Mode:Using the drop-down menu, select which parts of the video (visual) from your video call that you want to record. The options for this section are:
Video Image Size:This allows you to determine how large the videos are, and comes in the following pixel dimensions:
TIP: Please use 226P or 360P option if your PC/Laptop is prone to running slowly. Any larger and your PC may not be able to run the real-time encoding of the video. TIP: Please use 720P to get the best quality of video only if your Skype supported high definition video call. Video Frame Rate:The frame rate determines the number of frames that pass per second throughout the video. TIP: The higher the frame rate selected the better video quality you will achieve. However, if your PC/Laptop runs slow, it probably won't be able to handle a higher frame rate. | ||
|
Tweet
©2007 - 2013 Supertintin - Supertintin Home - Terms of Service - Report an issue - Affiliates - Skype Video Recorder - Supertintin is not affiliated with MSN. MSN is a trademark of Microsoft Supertintin is not affiliated with Skype. Skype is a trademark of Skype Technologies SA |